BRAKE SYSTEM MAINTENANCE
Using a brake bleeding tool correctly removes air from hydraulic lines and ensures consistent pedal pressure. The process involves attaching the tool to each bleeder valve on your automotive brake valves, flushing old fluid, and confirming bubble-free flow before moving to the next wheel. Done properly, it takes under 30 minutes per axle and can restore a firm, responsive pedal without workshop costs.
Why Bleeding Your Brakes Actually Matters
Brake fluid absorbs moisture from the atmosphere over time. Once water content reaches 3% or more, the fluid's boiling point drops sharply—from roughly 230°C for fresh DOT 4 fluid down to around 155°C. During hard braking, this water-contaminated fluid can vaporize inside the caliper, creating compressible gas pockets. The result is a brake pedal that travels further than normal before engaging, commonly called a spongy pedal.
Air enters the system any time a brake line, caliper, or wheel cylinder is opened for service. Even a few milliliters of trapped air at an automotive brake valve can cause the pedal to sink noticeably. Bleeding forces that air out through the bleeder screws on each corner of the vehicle, restoring the incompressible fluid column that makes hydraulic braking work.
Most manufacturers recommend a full brake fluid flush every two years regardless of mileage, and immediate bleeding any time brake components are replaced. Racing applications with repeated high-temperature stops often call for fresh fluid at every event.
3% moisture content that triggers significant boiling point drop in DOT 4 fluid
2 yr typical manufacturer-recommended fluid flush interval
~75°C reduction in boiling point once water contamination sets in
Types of Brake Bleeding Tools and What Each One Does
Choosing the right tool determines how quickly and cleanly you can bleed the system. Each type has a distinct mechanism, and matching it to your situation saves time and avoids introducing fresh air.
01
Vacuum Pump Bleeders
A hand-held or pneumatic pump creates negative pressure at the bleeder valve, drawing fluid and air out of the line without anyone operating the brake pedal. This makes it a genuine one-person tool. The catch bottle and clear tubing let you watch for bubbles. Most vacuum kits include four to six adapters to fit the various bleeder valve thread sizes found on different vehicles. The main limitation is that suction can sometimes draw air past the bleeder valve threads if the valve is slightly worn, giving false bubble readings in the catch bottle.
02
Pressure Bleeders
A pressure bleeder attaches to the master cylinder reservoir cap and applies regulated air pressure—typically between 10 and 15 psi—to push fluid from the top of the system downward through each automotive brake valve. The advantage is a steady, consistent flow that dislodges air pockets sitting in proportioning valves or ABS modulators. High-quality pressure bleeders include a built-in gauge and a safety pressure limit to prevent reservoir damage. Entry-level kits start around $30, while professional units with universal cap adapters can reach $200 or more.
03
Reverse (Back-Fill) Bleeders
Reverse bleeders push clean fluid upward from the bleeder valve toward the master cylinder. Because air rises, this direction naturally floats bubbles toward the reservoir where they exit harmlessly. A syringe or hand pump connects directly to the bleeder valve fitting. Reverse bleeding is especially effective after replacing a master cylinder or caliper, since air at the highest point of the circuit is difficult to shift in the conventional direction. This method is frequently chosen by professional technicians for ABS system bleeding, where trapped air can lodge in solenoid chambers.
04
Gravity Bleed Sets
The simplest approach: attach a clear hose to the bleeder valve, open it a half turn, and allow gravity to pull fluid through the line while you keep the reservoir topped up. No pumping, no external tool pressure. Gravity bleeding works well for routine maintenance flushes when no air has been introduced, but it is slow—expect 10 to 15 minutes per wheel—and it may not clear stubborn air pockets trapped in caliper passages above the bleeder port. A one-way check valve inline with the hose prevents fluid from flowing back if you momentarily lose attention.
Tools and Supplies You Need Before Starting
Gathering everything before the vehicle goes up on stands prevents interruptions that lead to air entering an open system. The list below covers a complete brake bleed on a standard passenger car with four-wheel disc brakes.
Required Tools
- Brake bleeding kit (vacuum, pressure, or reverse type)
- Box-end wrench in the correct size for your bleeder valves (most common: 8 mm, 10 mm, or 11 mm)
- Floor jack and two to four jack stands rated for vehicle weight
- Wheel chocks
- Turkey baster or fluid syringe for removing old fluid from reservoir
- Clean rags and brake cleaner spray
- Catch bottle or drain pan
- Penetrating lubricant if bleeder valves are corroded
Consumables
- Correct brake fluid specification for your vehicle (DOT 3, DOT 4, DOT 5.1, or DOT 5—never mix types)
- At least 500 ml of fresh fluid for a standard flush, 1 liter for a comprehensive system purge
- Rubber dust caps for bleeder valves
- Nitrile gloves—brake fluid strips paint and irritates skin
DOT 5 silicone fluid is not compatible with systems designed for DOT 3 or 4. Mixing them causes the rubber seals in calipers and master cylinders to swell and fail. Always confirm your vehicle's specification before purchasing.
Bleeding Order: Which Wheel to Start With
The conventional sequence starts at the wheel farthest from the master cylinder and works progressively closer. On most front-engine, rear-wheel-drive vehicles the master cylinder sits in the engine bay on the driver's side, making the sequence: rear passenger, rear driver, front passenger, front driver. Front-wheel-drive vehicles typically follow the same pattern.
The logic is straightforward: the longest brake line has the most opportunity to collect air. Bleeding the farthest point first pushes any contaminants the full length of the system and out the nearest valve rather than trapping them midway. On vehicles with ABS, the manufacturer may specify a different sequence that cycles the ABS modulator. Always check the service manual before starting on ABS-equipped cars, because improper order can lock air inside the modulator valves.
Standard bleeding sequence for common vehicle layouts
| Bleeding Order |
Wheel Location |
Typical Line Length |
Notes |
| 1st |
Rear Passenger |
Longest |
Start here for most vehicles |
| 2nd |
Rear Driver |
Long |
— |
| 3rd |
Front Passenger |
Medium |
— |
| 4th |
Front Driver |
Shortest |
Closest to master cylinder |
Vehicles with diagonal split braking systems (common on modern front-wheel-drive cars) pair the right front with the left rear and the left front with the right rear for independent hydraulic circuits. Some manufacturers recommend bleeding each circuit separately. Confirm with your vehicle's documentation when in doubt.
Step-by-Step: Using a Vacuum Brake Bleeding Tool
The vacuum method is the most accessible for solo work and covers the majority of routine bleeding tasks. The following steps apply to most hand-pump vacuum kits.
1
Prepare the Master Cylinder
Remove the reservoir cap and use a clean syringe or turkey baster to extract most of the old fluid. Leave a small amount covering the port at the bottom of the reservoir—never let it run completely dry. Refill with fresh, specification-correct brake fluid. This ensures the fluid being drawn through the lines is new from the moment you start. Replace the cap loosely so pressure can equalize without spilling.
2
Locate and Clean the First Bleeder Valve
Start at the wheel farthest from the master cylinder. Remove the rubber dust cap from the bleeder screw and clean the area with brake cleaner spray. Inspect the valve for corrosion. If it has seized, apply penetrating lubricant and allow 10 minutes before attempting to open it. A snapped bleeder valve is a serious setback—gentle soaking prevents this. The bleeder valve on disc brake calipers is typically positioned at the top of the caliper body so air can escape upward naturally.
3
Attach the Correct Adapter and Hose
Select the adapter from your kit that fits the bleeder valve thread. Press it firmly onto the valve. Connect the clear collection hose between the adapter and the catch bottle. Ensure the far end of the hose is submerged in the small amount of fluid already in the catch bottle—this prevents air from being sucked back through the hose when pressure cycles. A poor hose seal at the adapter is the most common source of false air bubble readings with vacuum bleeders.
4
Open the Bleeder Valve and Apply Vacuum
Using a box-end wrench, open the bleeder valve between a quarter and a half turn—no more. Insert the pump handle and begin pumping to build vacuum. Fluid will begin moving through the clear hose almost immediately. Watch the fluid color and check for bubbles. Old brake fluid is typically dark amber or brown; fresh fluid is clear to very pale yellow. Continue pumping slowly and steadily. Rapid pumping can cavitate the system and introduce air around the bleeder threads.
5
Monitor, Top Up, and Close
Check the master cylinder reservoir every 30 to 45 seconds while pumping. It must never fall below the minimum mark—add fresh fluid continuously as needed. Once the fluid emerging from the bleeder runs completely clear, bubble-free, and consistent in color, close the bleeder valve firmly by tightening it with the wrench. Do not overtighten; bleeder screws are relatively soft and can strip easily. Torque values around 8 to 12 Nm are typical for most automotive brake valves.
6
Move to the Next Wheel and Repeat
Remove the hose and adapter, replace the rubber dust cap on the now-closed bleeder valve, and move to the next wheel in the sequence. Repeat the full process. After completing all four wheels, top the reservoir to the maximum line with fresh fluid and secure the cap. Press the brake pedal several times—it should feel firm and consistent, not spongy or long-travel.
Using a Pressure Bleeder: Key Differences
Pressure bleeders replace the vacuum approach with a reservoir cap adapter that introduces regulated air pressure from above. The setup takes longer but produces a more even, consistent fluid flow that is particularly effective at purging air from complex automotive brake valve assemblies like proportioning valves and ABS modulators.
A
Fill the pressure bleeder's fluid tank with fresh brake fluid and attach the correct reservoir cap adapter for your vehicle. Tank pressure should be set between 10 and 15 psi—higher pressure risks damaging reservoir seals.
→
B
Attach the hose and collection bottle to the first bleeder valve. Open the valve a quarter turn. The pressurized fluid in the reservoir will begin pushing fluid through the system immediately without pedal input.
→
C
Monitor the hose for bubbles. Once clear, close the valve and move to the next wheel. Because the reservoir is pressurized throughout, there is no risk of running dry between wheels as long as the tank has sufficient fluid.
→
D
After all four wheels, release the pressure from the cap adapter before removing it. Refill the reservoir if needed. A pressure bleeder can complete a full four-wheel flush in approximately 15 minutes once the setup is in place.
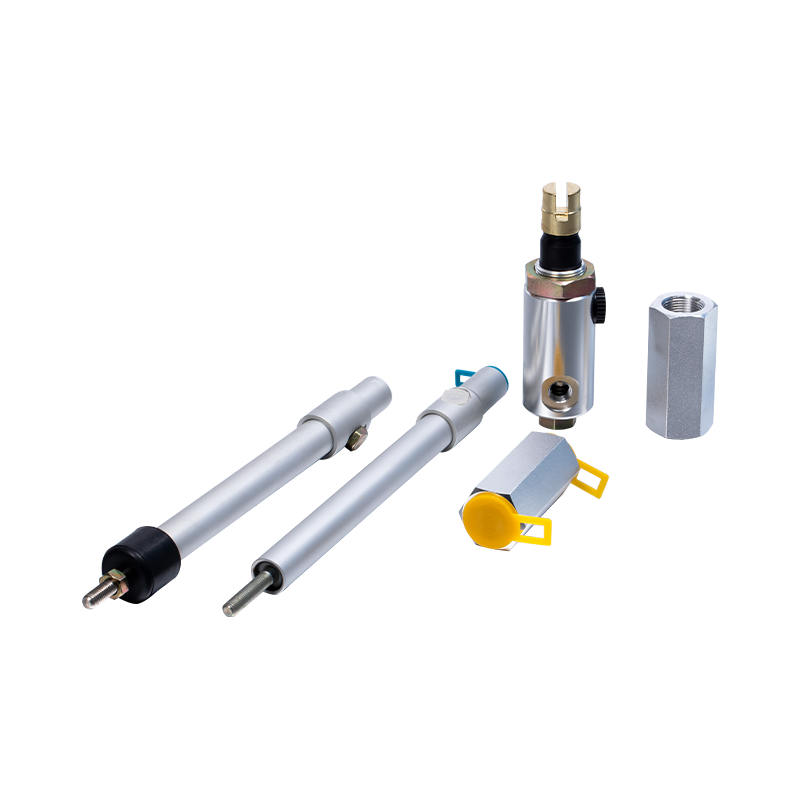
Automotive Brake Valves: What They Are and Why They Affect Bleeding
The term automotive brake valves covers several distinct components in a vehicle's hydraulic system, and each one can complicate the bleeding process if not understood properly.
Proportioning Valves
A proportioning valve limits hydraulic pressure to the rear brakes relative to the front, preventing rear wheel lockup under hard braking. It sits in the brake line between the master cylinder and the rear calipers or wheel cylinders. Proportioning valves can trap air in internal chambers that are not easily purged by simple gravity or vacuum methods. Using a pressure bleeder at 12 to 15 psi creates enough flow to dislodge air pockets from these chambers. On vehicles with an adjustable proportioning valve, the valve should be in its normal operating position during bleeding.
ABS Modulators
Anti-lock brake system modulators contain a series of solenoid valves that rapidly open and close during an ABS event. Air trapped in these solenoid chambers will not exit through normal bleeding because the valves remain closed. Many ABS systems require a scan tool to cycle the solenoids open while fluid is flowing through the system—a procedure called ABS modulator bleeding or actuator bleeding. Attempting to bleed an ABS system without this step may leave a spongy pedal even after the wheel-level bleeder valves show clean fluid.
Residual Pressure Valves
Found in systems with drum brakes or in some older master cylinders, residual pressure valves maintain a small amount of static pressure in the brake lines (typically 2 to 10 psi) to keep drum brake wheel cylinder cups seated and prevent fluid from draining back from long lines. These valves allow one-way flow and can make reverse bleeding difficult unless a special adapter bypasses them. Knowing whether your vehicle has residual pressure valves helps you select the right bleeding approach before you start.
Common Mistakes and How to Avoid Them
Several errors recur across DIY brake bleeding attempts. Recognizing them in advance saves time and prevents damage to the hydraulic system.
Running the Reservoir Dry
The single most damaging mistake. If the master cylinder runs out of fluid, air is sucked into the entire system from the top, requiring a complete re-bleed from scratch. Keep one eye on the reservoir level constantly while the bleeder valve is open.
Forgetting to Close the Valve Before Releasing Pedal
When using the two-person pedal-pump method, the bleeder valve must be closed before the pedal is allowed to return. If the pedal rises with the valve open, it draws air back into the caliper through the hose. This is the most common error with traditional hand-pump bleeding.
Over-Tightening Bleeder Screws
Bleeder screws are made of soft metal and can snap inside the caliper if overtightened. A snapped bleeder screw requires caliper replacement in most cases. Tighten to hand-firm, then add no more than a quarter turn with a wrench.
Mixing Brake Fluid Types
DOT 3, 4, and 5.1 are glycol-based and can be mixed in an emergency, but this dilutes performance. DOT 5 silicone is completely incompatible with glycol fluids and will damage all rubber seals. Always confirm the specification before purchasing new fluid.
Ignoring Corroded Bleeder Valves
A bleeder valve that has not been opened in several years can seize completely. Forcing it risks snapping the valve. Apply penetrating oil and allow adequate soak time. On very corroded valves, applying heat from a torch for a few seconds can break the corrosion bond before attempting to open.
Not Test-Driving After Bleeding
Always test the brake pedal feel with a gentle press before moving the vehicle. The pedal should feel firm and consistent within the first inch of travel. Then test at low speed in a safe area before returning to normal driving. A pedal that still feels spongy after bleeding indicates trapped air remains, most often in an ABS modulator or a high point in the line.
When Bleeding Alone Is Not Enough
A brake bleeding tool solves air-in-lines problems effectively, but some spongy pedal conditions have other root causes that bleeding will not fix.
A master cylinder with worn internal seals can allow fluid to bypass internally without any external leak. The pedal will feel soft and may slowly sink under constant pressure even with perfectly bled lines. Testing for this involves holding firm pedal pressure for 30 seconds—if the pedal slowly drops toward the floor under steady force, the master cylinder is the likely cause rather than trapped air.
Flexible brake hoses deteriorate from the inside as the inner rubber lining breaks down, creating a one-way valve effect or internal restriction. The hose looks fine externally but collapses under pressure, causing a dragging brake or inconsistent pedal feel that bleeding will not cure. Hoses should be replaced every eight to ten years regardless of visible condition.
Caliper pistons that do not retract fully after a brake application can also produce pedal symptoms. Bleeding the system repeatedly without addressing seized caliper slides or pistons will produce clean, bubble-free fluid but no improvement in feel. If bleeding produces clean fluid and the pedal is still long or spongy, systematically check each caliper for piston movement and slide freedom.
Brake fluid contaminated with petroleum products (such as power steering fluid or mineral oil) requires complete flushing of the entire system and replacement of all rubber components—master cylinder cups, caliper seals, and hoses. Even small amounts of petroleum cause rapid swelling of glycol-compatible rubber, and no amount of bleeding will resolve the damage until the contaminated components are replaced.
Choosing a Brake Bleeding Tool for Your Situation
The right tool depends on how frequently you work on vehicles, whether you have assistance available, and the complexity of the brake system being serviced.
Comparison of brake bleeding tool types by use case
| Tool Type |
Best For |
Approx. Cost |
Assistance Needed |
ABS Compatible |
| Vacuum Pump |
Solo routine maintenance |
$20–$80 |
None |
Partial (no modulator) |
| Pressure Bleeder |
Complex systems, ABS, fast flush |
$30–$200 |
None |
Better than vacuum |
| Reverse Bleeder |
New master cylinders, calipers |
$15–$50 |
None |
Yes (with scan tool) |
| Gravity Bleed |
Routine fluid refresh, no air |
Under $10 |
None (slow) |
Limited |
| Two-Person Pedal Pump |
All systems, no special tools |
Under $5 |
Required |
Yes (with scan tool) |
For someone who services one or two vehicles per year, a mid-range vacuum kit at around $40 to $60 covers the vast majority of needs. Enthusiasts working on multiple vehicles, or those dealing with ABS systems regularly, benefit from adding a pressure bleeder to their kit. Professional shops dealing with high-volume throughput typically use pneumatic pressure bleeders fed from shop air.
Maintenance Tips to Make Future Bleeds Easier
A few habits adopted now significantly reduce the time and difficulty of future brake bleeds.
- Apply a small amount of anti-seize compound to the bleeder valve threads each time you close them. This prevents corrosion bonding between the valve and caliper and ensures the valve opens cleanly next time.
- Replace rubber dust caps on every bleeder valve after each service. Missing caps allow moisture and road debris to sit against the valve, accelerating corrosion. Replacement caps cost less than one dollar each and are sold in bags of ten.
- Note the date of each fluid change in a service log. Two years is the standard interval, but high-mileage drivers and those in humid climates may benefit from annual changes given the hygroscopic nature of glycol-based fluids.
- Check bleeder valve operation at every brake pad change—about every 30,000 to 50,000 miles for most vehicles. Opening and closing each valve even briefly during a pad change keeps them free and confirms their condition while the wheel is already removed.
- Store fresh brake fluid in a tightly sealed container. An open bottle absorbs moisture from the air within weeks, reducing the benefit of a fresh fluid flush. Use new, sealed bottles for brake fluid changes wherever possible.
 English
 русский
 中文简体
中文简体